Deploying Robot Code#
Bring your creation to life!
Overview#
This section will help you learn to deploy code to your robot.
See table of contents for a breakdown of this section.
How to deploy#
Hardware#
To deploy code, first make sure your computer is connected to the robot in ONE of the following ways:
- USB
- Ethernet
- Robot's Wireless Network
Software#
Note
Make sure your team number in **wpilib_preferences.json** in the **.wpilib** folder is set to the same team number your roboRIO was programmed for (it should be the number you set when creating the project and you will NOT need to check this every time as it should not change by itself).
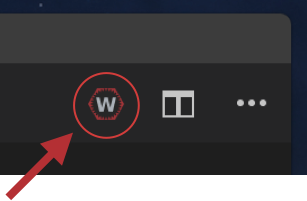
!!! abstract “” 1) Select the W icon from the tab bar or use the shortcut by holding down Ctrl+Shift+P at the same time. (Replace ctrl with cmd on macOS)
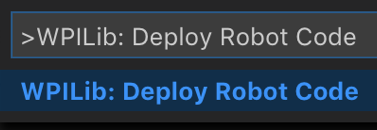
!!! abstract “” 2) Type and hit enter or select: WPILib: Deploy Robot Code
Tip
Alternatively you can do one of the following:

- Use **Shift+F5** at any time to deploy. (you may also need to hold fn depending on your computer configuration)
- Right-click on the build.gradle file in the project hierarchy and select “Build Robot Code”
- Open the shortcut menu indicated by the ellipses in the top right corner of the VS Code window and select “Build Robot Code”
Testing#
- Open up the DriverStation software on any computer that has it installed.
- Enable the robot
- Try moving the joysticks on your controller when enabled.
- If it doesn’t, check your port numbers for your controller, axes, and motor controllers
Reading the error log
If the robot does not behave as expected after enabling, check the Messages panel at the bottom of the Driver Station window for error output. Common errors to look for:
- Resource allocation errors — if two motor controllers, sensors, or other devices are configured to use the same port or CAN ID, the roboRIO will log an allocation error stating that there are conflicting IDS. Double-check your
Constants.javavalues and make sure no two devices share a port.
Note
Duplicate CAN ID's must be fixed with either the robot powered off, or with the SparkMax controller unplugged, as the SparkMax will not allow you to change its CAN ID while it is powered on and connected to the CAN bus.
- "Robot program exited unexpectedly" — unlike a regular Java application, the robot program does not stop running when an exception is thrown. Unhandled exceptions will be printed to the log but the program will continue running, sometimes in a broken state. Always check the log if the robot acts strangely.
- CAN bus errors — if a SparkMax or other CAN device isn't responding, it will log timeout messages. Make sure the device is powered on and wired correctly.